Understanding the Story Editor
The Editor is where your book comes together — one visual canvas for text, illustrations, characters, and page layout. This tour breaks the screen into three simple zones so you always know where to find things.
The zones at a glance
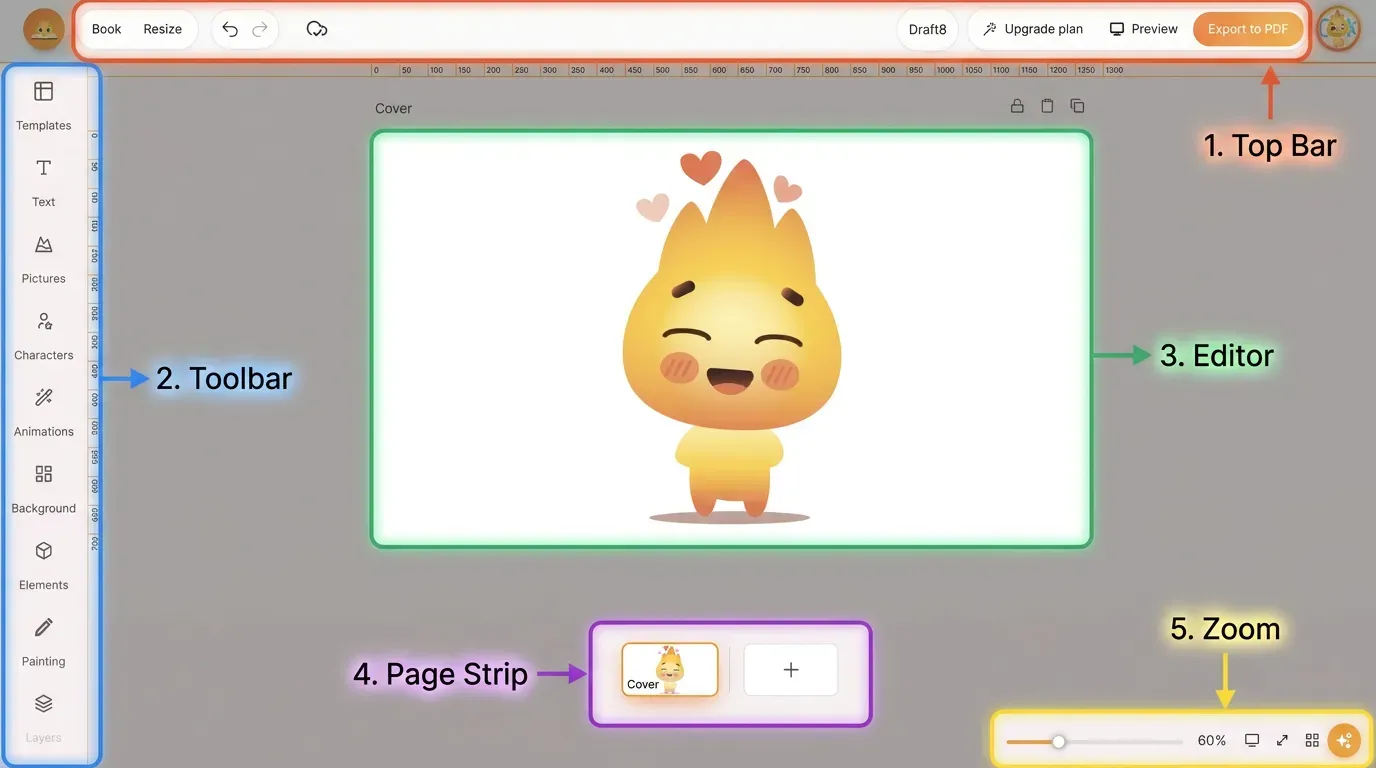
- Top bar — modes, undo/redo, saving, book title, Preview, Export to PDF.
- Toolbar — every tool for building a page, down the left side.
- Editor — the page you're editing right now.
- Page strip — cover, all pages, and “+” to add one.
- Zoom — scale the canvas in and out.
1. The top bar
Runs across the top and holds the book-wide controls:
- Book / Resize — switch between editing your pages (Book) and changing the book's format or size (Resize).
- Undo / Redo and a saving indicator (the cloud icon) — your work saves automatically as you go.
- Book title — click it to rename the book.
- Preview — see the book the way a reader will.
The Book menu
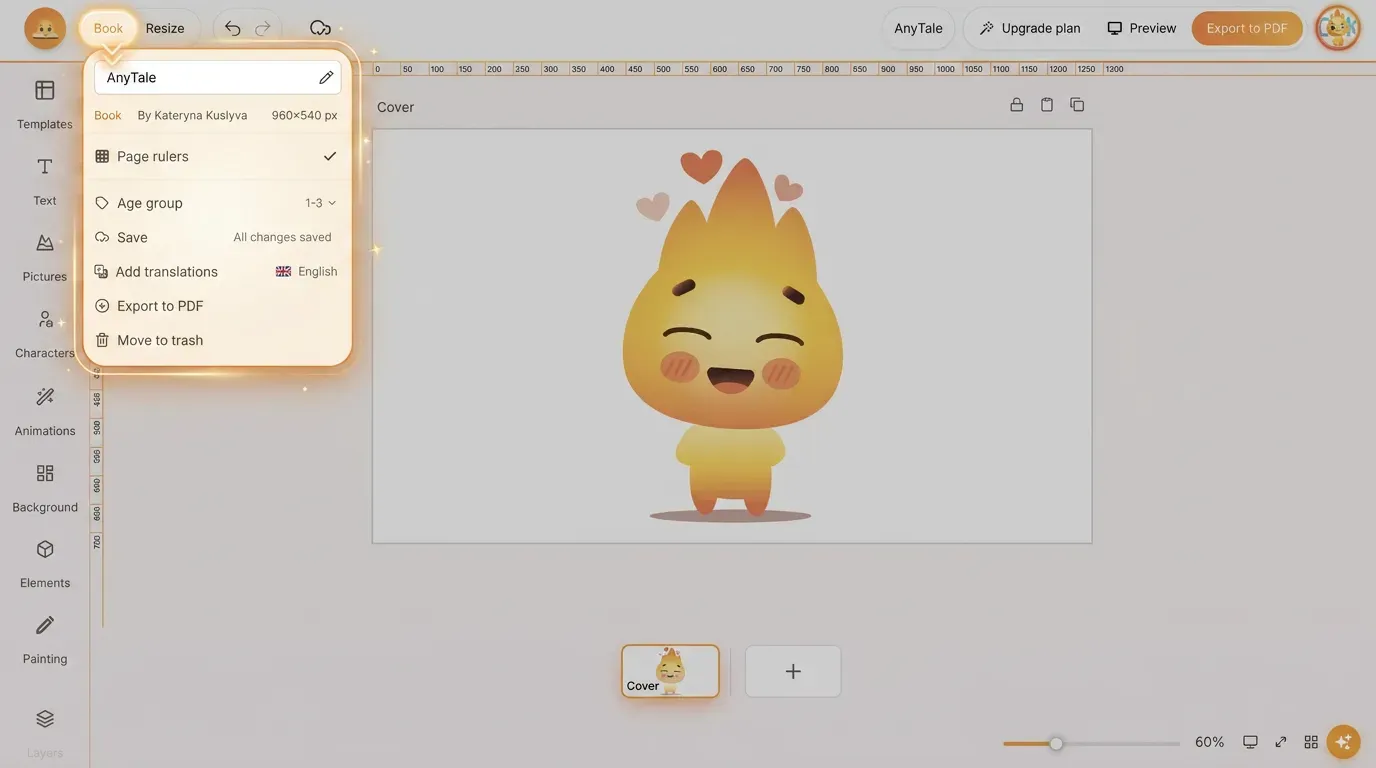
Click Book in the top-left corner to open the book's settings menu. At the top it shows the book's title (with a pencil to rename it) and a quick info row — book type, author, and page size (e.g. 960×540 px). Below that:
| Menu item | What it does |
|---|---|
| Page rulers | Show or hide the measurement rulers around the canvas. The checkmark means they're on. |
| Age group | Set the target age range for the book (e.g. 1–3), which guides length and tone. |
| Save | Shows your current save status; “All changes saved” confirms everything is stored. |
| Add translations | Translate the book into another language; the flag shows the current one (e.g. English). |
| Export to PDF | Download the finished book as a PDF — the same as the button on the right. |
| Move to trash | Send the whole book to the trash. Use with care. |
2. The toolbar (left side)
Each icon opens a panel for adding or changing something on the current page:
| Tool | What it does |
|---|---|
| Templates | Ready-made page layouts to start from. |
| Text | Add and style text boxes — fonts, size, color, alignment. |
| Pictures | Add illustrations and images to the page. |
| Characters | Place your story's characters and keep them consistent. |
| Animations | Add gentle motion to elements on the page. |
| Background | Set a background color or image for the page. |
| Elements | Decorative shapes, stickers, and design elements. |
| Painting | Draw freehand directly on the page. |
| Layers | See and reorder everything stacked on the page. |
| Folders | Organize your saved assets and uploads. |
3. The Editor & your pages
The canvas in the center shows the page you're working on. Select any element to move, resize, or restyle it. Above the page you'll find quick page actions — reorder (move up/down), lock, duplicate, copy, and delete.
Along the bottom, the page strip shows your Cover and every page as a thumbnail. Click a thumbnail to jump to that page, or press + to add a new one. Use the zoom slider on the bottom-right to move in for detail or out to see the whole spread.
Tip: Everything you add lives on a page, and every page is a thumbnail in the strip. If something seems to disappear, check the Layers panel — it may just be behind another element.
Share this article
Need help? Have a question? Chat with our team — we're happy to help.